STRAWBERRY CHEESECAKE
Ingredients
- 10 Portions
-
Baked Cheesecake
- 732g Avonmore Professional Cream Cheese
- 216g Granulated Sugar
- 33g T55 Flour
- 174g Eggs
- 24g Egg yolks
- 1854g Avonmore Professional Cream 35.1%
- 1 ½ Vanilla Pod
-
Vanilla Cheesecake Creme
- 1243g Avonmore Professional Cream Cheese
- 72g Icing Sugar
- 402g Granulated Sugar
- 144g Water
- 228g Egg Yolks
- 60g Gelatine Mass
- 1566g Avonmore Professional 38% Whipped Cream
-
Biscuit
- 120g Avonmore Professional Unsalted Butter
- 120g Demerara Sugar
- 1.2g Fine Salt
- 1.2g Cinnamon
- 1.2g Nutmeg
- 42g Whole Eggs
- 168g Flour
- 3g Baking Powder
-
Biscuit Base
- 339g Baked Biscuit
- 120g Feuilletine
- 1.2g High Quality Salt
- 186g Blond Chocolate
- ¾ Lemon Zest
-
Strawberry Confit Layer
- 287g Strawberry Purèe
- 58g Inverted Sugar Trimoline
- 19g Granulated Sugar
- 6.5g Pectin NH
- 26g Gelatine Mass
- 5g Yuzu juice
- 10g Strawberry Liqueur
-
Red Glaze
- 150g Water
- 300g Glucose DE40
- 300g Sugar
- 200g Condensed Milk
- 300g White Chocolate
- 350g Gelatine Mass
- Red Hydrosoluble Food colouring
Featured Product

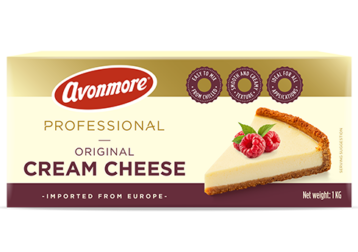
Cream Cheese 1Kg
The recipe, Step by Step
Elements
- Baked Cheesecake
- Vanilla Cheesecake Creme
- Biscuit
- Biscuit Base
- Strawberry Confit Layer
- Red Glaze
Décor:
-
Baked Cheesecake
1. In the bowl of a stand mixer fitted with the paddle attachment, combine the Avonmore Professional Cream Cheese, sugar, and flour. Mix until smooth.
2. Add the egg yolks and beaten eggs and mix until just combined.
3. Stir in the Avonmore Professional 35.1% cream and vanilla pod.
4. Pour the batter into a 170mm springform pan lined with parchment paper.
5. Bake at 90°C for 1 hour and 15 minutes.
6. Freeze completely.
-
Vanilla Cheesecake Creme
1. In the bowl of a stand mixer fitted with the paddle attachment, cream together the Avonmore Professional Cream Cheese and powdered sugar until smooth. Make sure the cream cheese is not straight from the fridge.
2. Separately, cook the granulated sugar and water to 121°C. Pour the hot sugar syrup over the egg yolks and whisk until thickened and pale.
3. Temper the melted gelatine into the still-warm pâte à bombe (sugar-egg yolk mixture).
4. Gently fold the pâte à bombe into the sweetened cream cheese.
5. Fold in the whipped cream.
6. Use immediately.
-
Biscuit
1. In the bowl of a stand mixer fitted with the paddle attachment, cream together the Avonmore Professional unsalted butter, brown sugar, salt, and spices until light and pale.
2. Add the eggs at room temperature and beat well after each addition.
3. Gradually add the sifted flour and baking powder mixture, beating until just combined.
4. Pass the batter through a fine-mesh sieve to remove any lumps.
5. Spread the mix evenly onto a Silpat-lined baking sheet.
6. Bake in a preheated oven at 150°C for 15 minutes.
7. Let cool on the baking sheet for a few minutes before transferring to a wire rack to cool completely.
-
Biscuit Base
1. In a large bowl, gently combine the crushed biscuits, feuilletine, Salt and lemon zest.
2. Melt the couverture chocolate to 45°C using a double boiler or microwave method.
3. Pour the melted chocolate over the dry ingredients and stir until evenly coated.
4. Line 160mm (6-inch) stainless steel rings with a 4cm (1.5-inch) tall acetate sheet.
5. Press the chocolate mixture firmly into the prepared rings, filling them to the top.
6. Freeze the tarts for at least 2 hours, or until solid.
7. Once frozen, remove the tarts from the rings and carefully peel off the acetate sheets.
-
Strawberry Confit Layer
1. In a saucepan, heat the strawberry purée, and inverted
sugar over medium heat.
2. Add the granulated sugar and pectin NH. Bring to a boil and cook for 1 minute.
3. Stir in the gelatine mixture, yuzu juice, and strawberry liqueur.
4. Pour the Strawberry mixture directly over the frozen cheesecake.
5. Freeze.
-
Red Glaze
1. In a saucepan, combine the water, glucose, and sugar. Heat over medium heat, stirring occasionally, until the sugar dissolves completely. Use a candy thermometer to reach 103°C.
2. Pour the hot sugar mixture over the chocolate, condensed milk and let it sit for a minute.
3. Using an immersion blender, blend the mixture for a good minute until smooth and glossy. Ensure you reach all areas of the bowl to incorporate all chocolate.
4. Add the bloomed gelatine to the hot glaze mixture. Blend for another 30 seconds to ensure its fully incorporated.
5. Strain the glaze through a fine-mesh sieve to remove any air bubbles or undissolved gelatine. Add your desired red food colouring and blend again for a few seconds until evenly distributed.
6. Using the Glaze:
7. Let the glaze cool to a working temperature between 30-35°C. It should be pourable but still thick enough to coat the cake. You can test the consistency by dipping a spoon in the glaze and letting it drip back into the container. It should coat the spoon but leave a clean trail when your finger runs across it.
8. Place your frozen cake (ensuring a smooth surface) on a wire rack set over a baking sheet to catch drips.
9. Pour the glaze over the frozen cake, starting from the centre and allowing it to cascade down the sides.
10. Once coated, use a scraper or offset spatula to gently smooth any imperfections on the sides.
11. Transfer the cake to a serving plate and allow it to thaw completely in the refrigerator before serving.
12. Make sure your cake is completely frozen before glazing. This helps the glaze set properly and achieve a mirror-like finish.
13. Work quickly with the glaze once it reaches the working temperature, as it starts to thicken as it cools.
14. If the glaze becomes too thick, you can reheat it gently over low heat, whisking constantly, until it reaches the desired consistency again. Don’t overheat, as this can affect the texture and shine of the glaze.
